1.Download Clash for macos client and install it
👉 Netflix Download Clash for macos Client
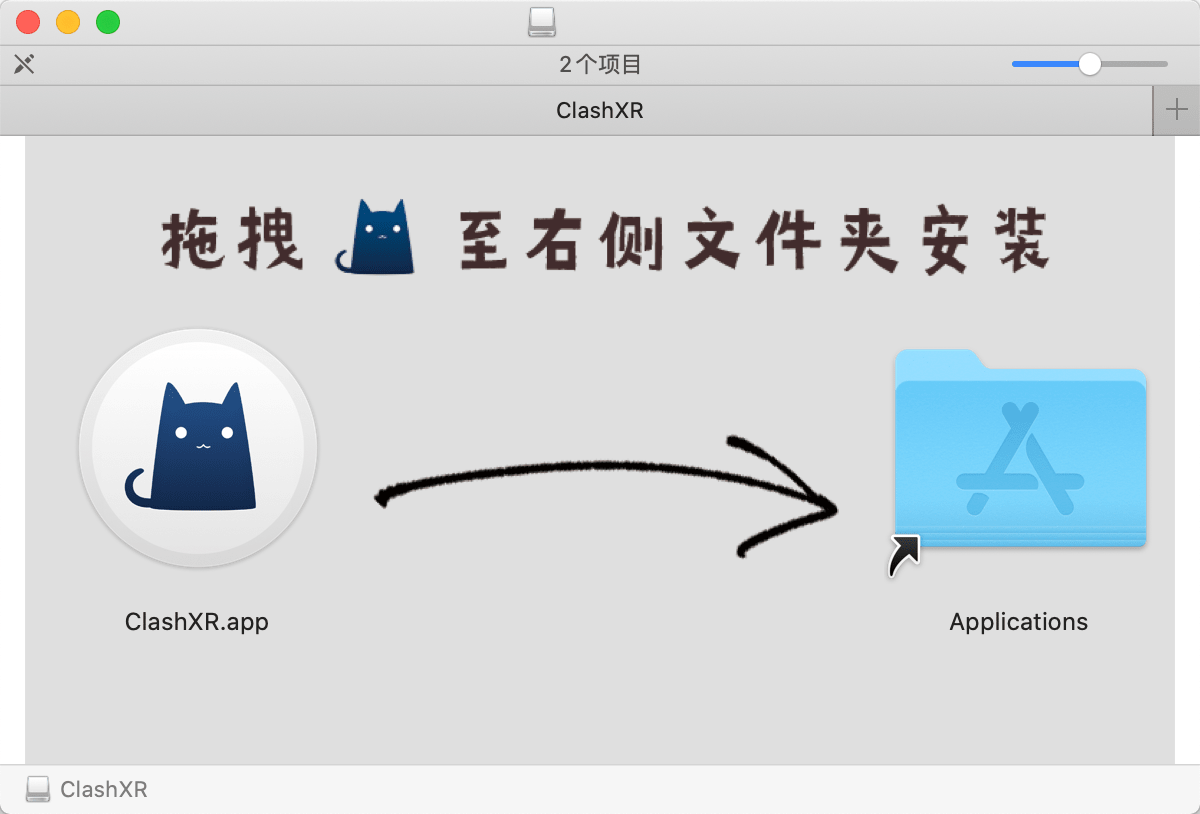
After downloading the Clash for macos client, double-click it to run it, and drag and drop the Clash icon into the Applications folder on the right.
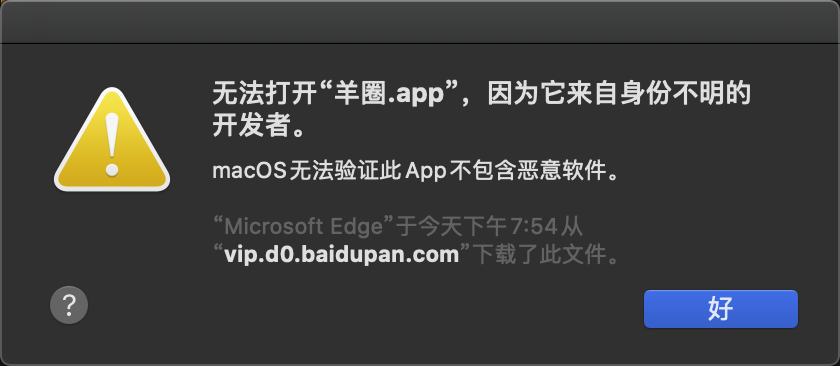
2. Developer authorization
3. Launch the software and import subscriptions
After installation, open the ClashXR program for the first time and enter the system password to authorize network access. The first time you open the program, you will need to enter your system password to authorize network privileges. Then you will see the Clash icon in the system tray, which is grayed out, meaning that the proxy is not turned on. Then we need to import the clash hosting.
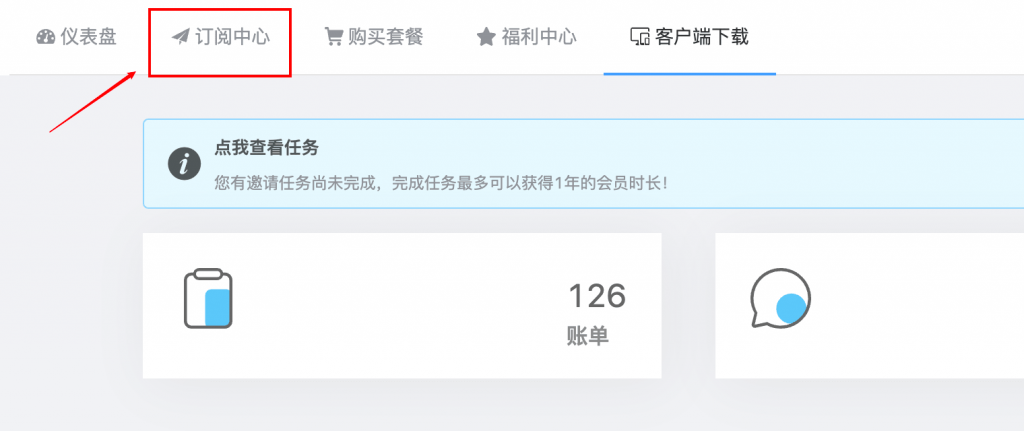
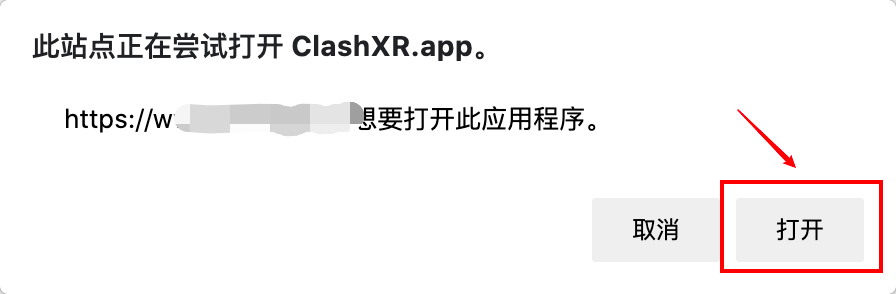
Go to the official website with your browser and click on Import Clash with one click.
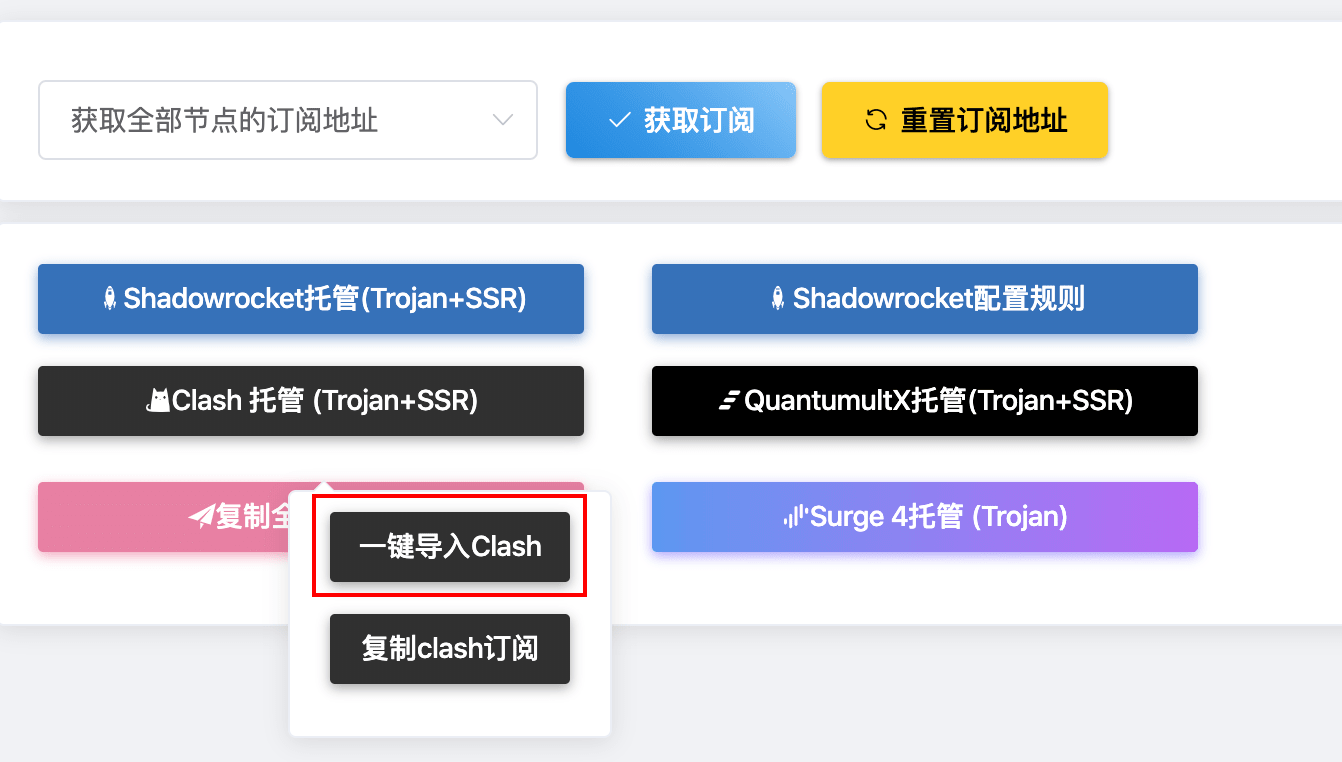
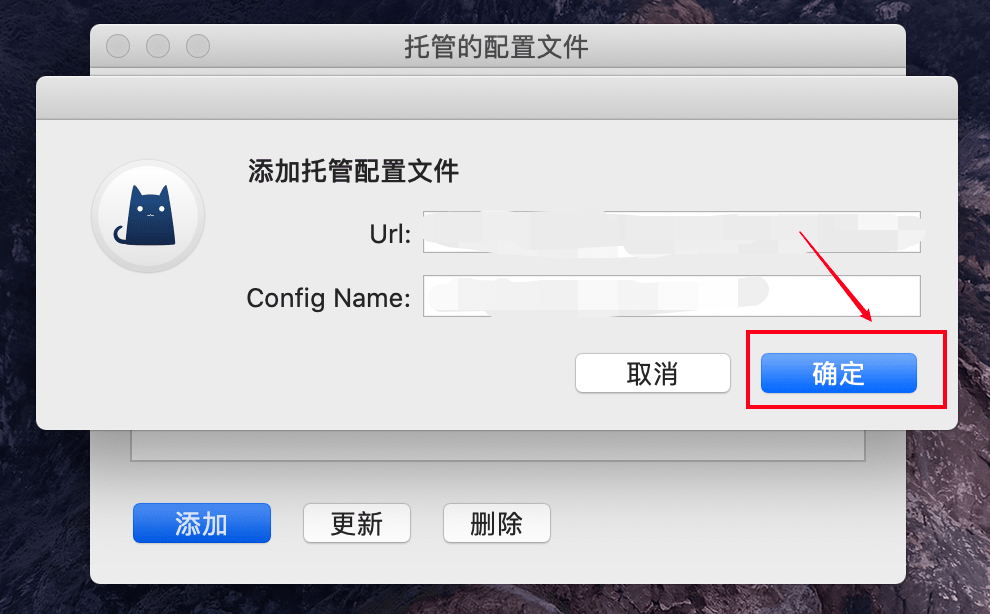
After clicking on it, a corresponding prompt will pop up, click OK all the way to successfully import the clash hosting.

4. Select node and connect successfully
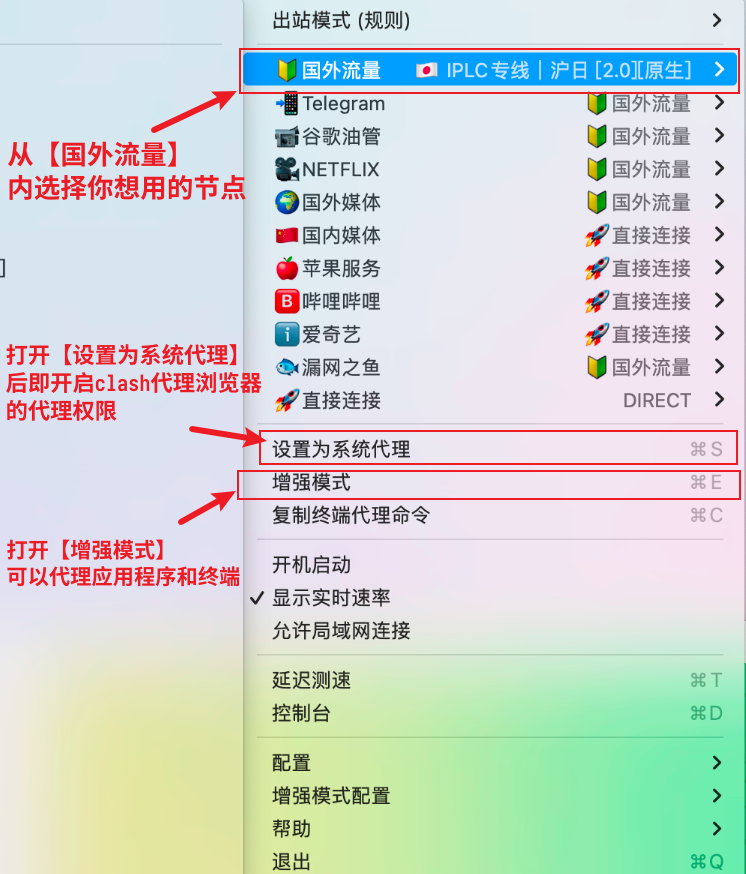
After successful hosting, the corresponding node/diversion policy will appear in the trayclash option, select a node you want to use in [Foreign Traffic], and if you are not familiar with other intelligent diversion, you can not need to configure it, and the default will not be moved.
After selecting, click [Set as System Proxy ] to turn on the proxy. At this time, the CLASH icon will turn black.
5. Enhanced mode
Normal mode clash can only proxy http and socks5 (browser, etc.), if you have the need to proxy applications, please open the [Enhanced Mode] can be.
6. How to delete a subscription and re-import it
Mac clash deletion configuration and re-import is more complicated, see the video below.
Q&A Frequently Asked Questions
Q&A Frequently Asked Questions
这个情况一般都是浏览器或者浏览器的插件问题,推荐使用chrome浏览器,并且关闭chrome内的代理类相关插件。